

English
The monthly payroll process
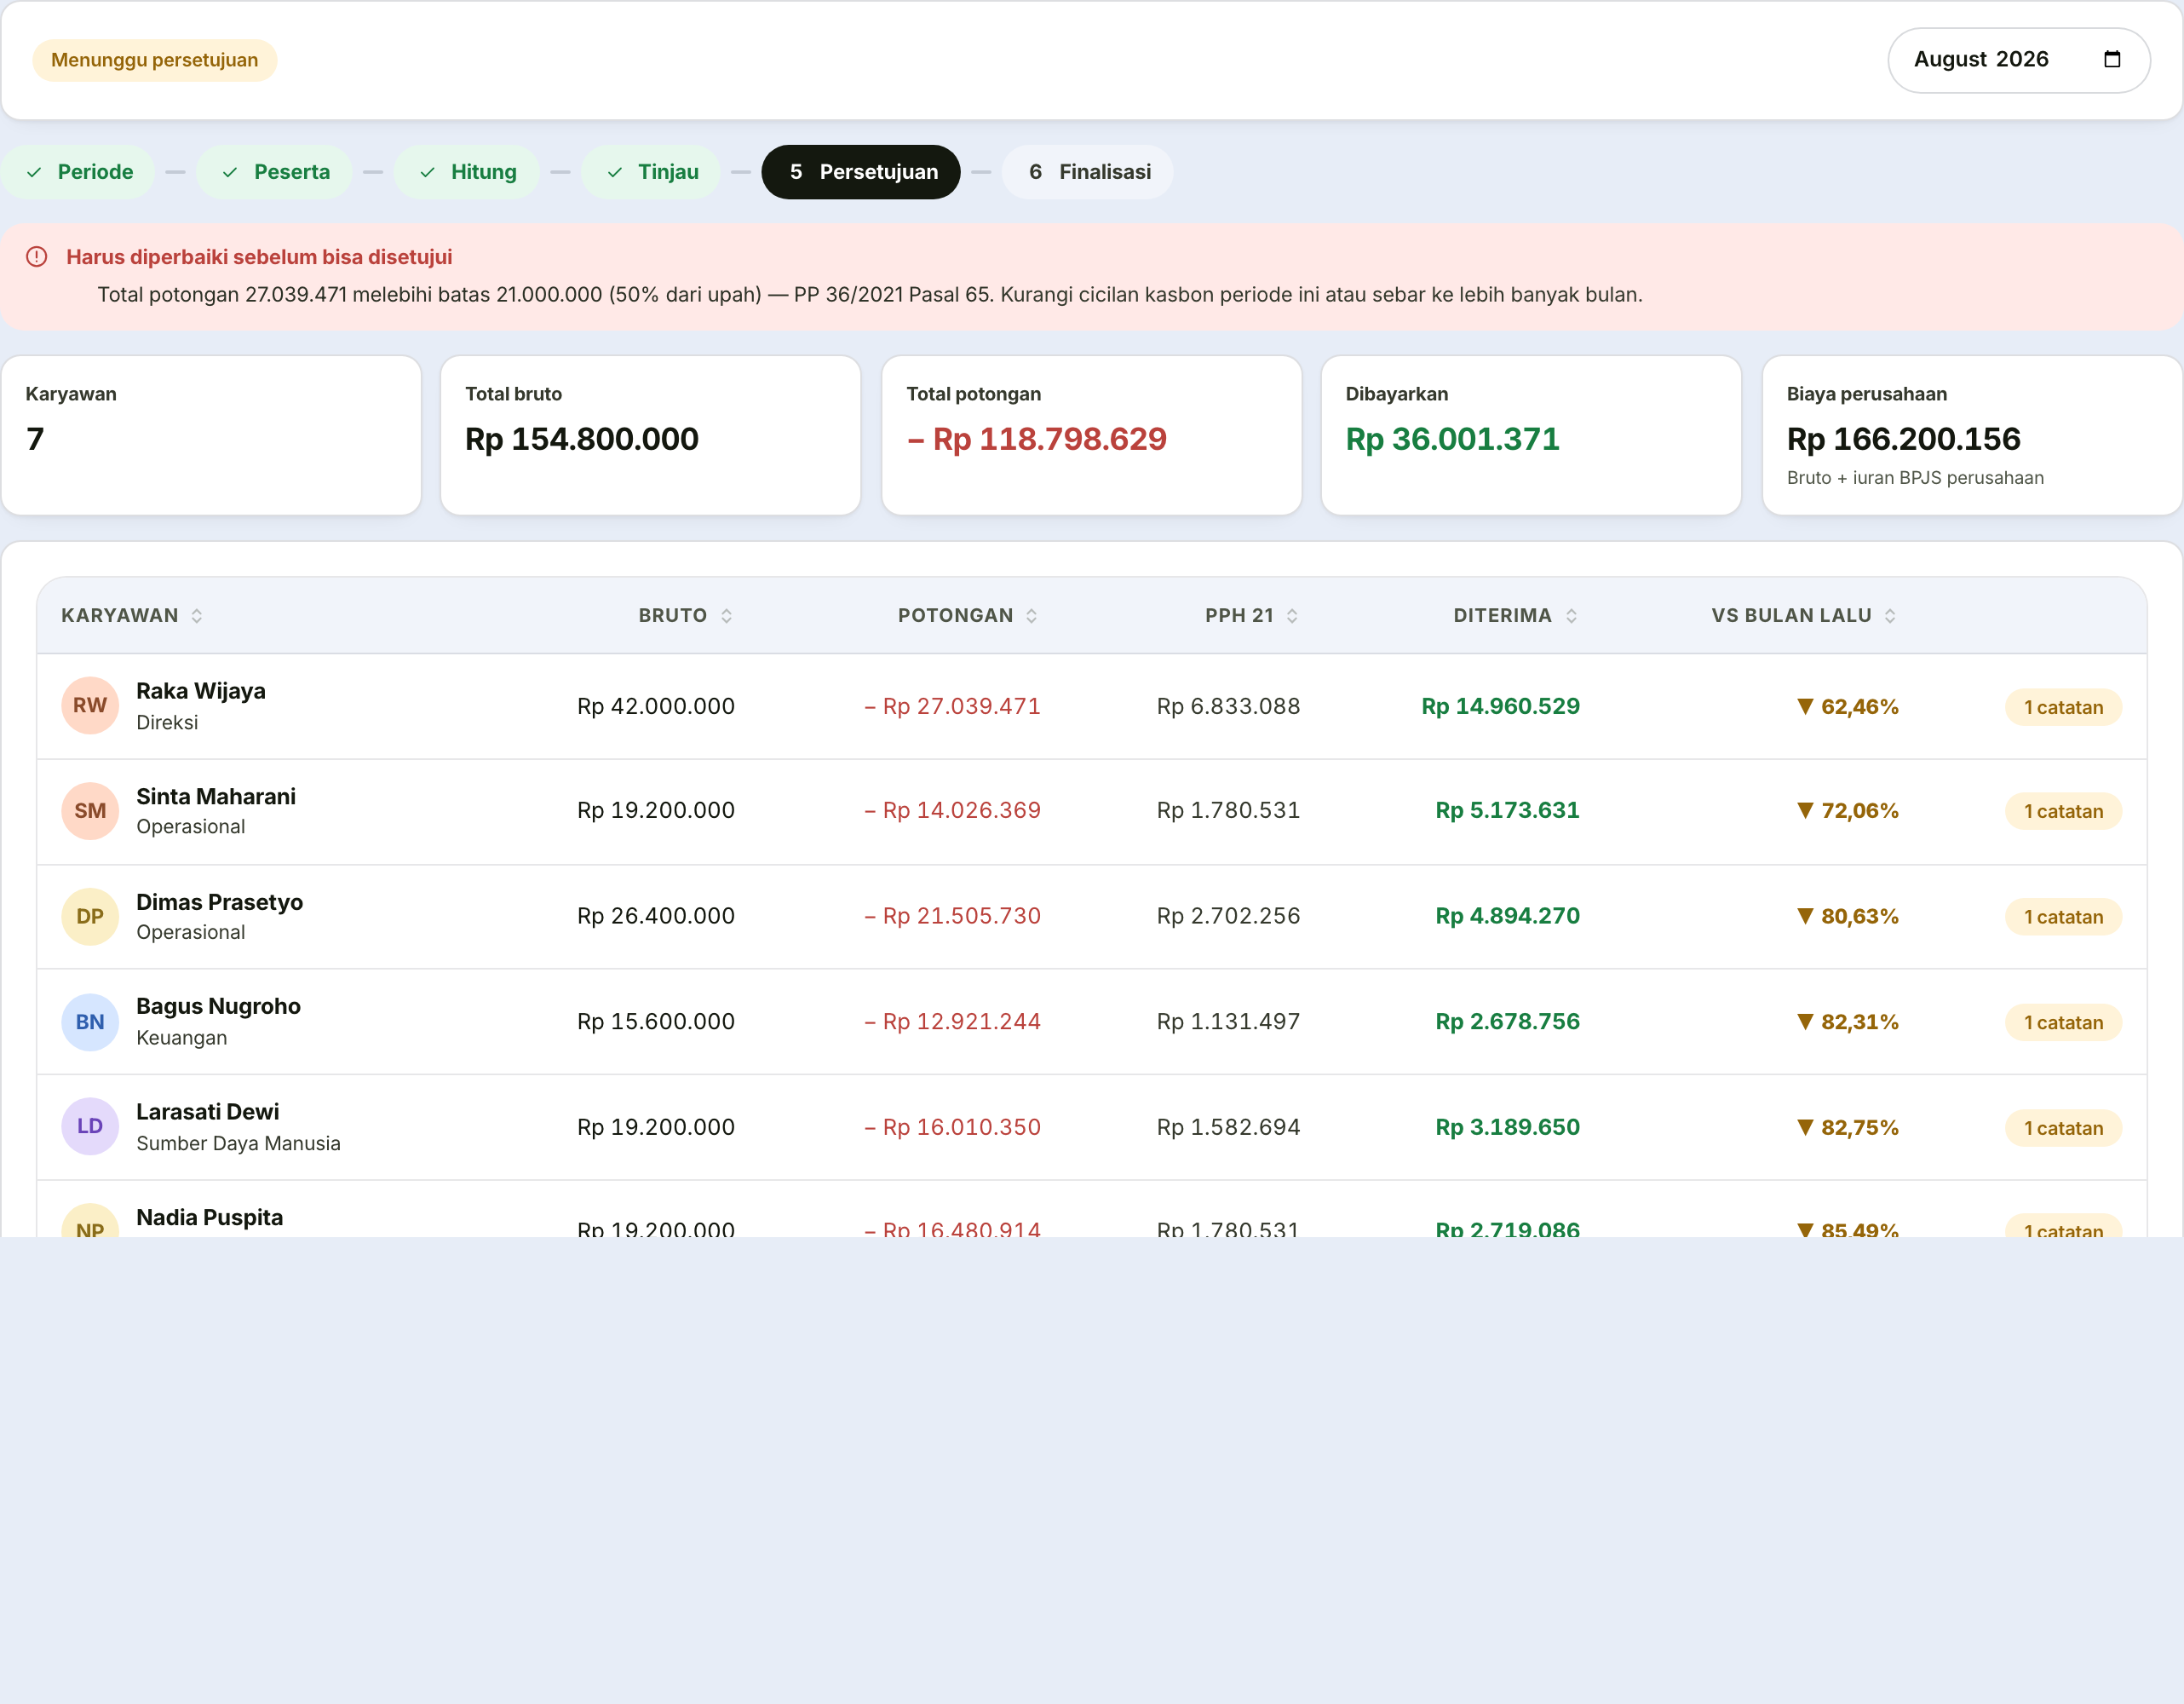
Six sequential steps at Payroll → Payroll Process. The active step is marked dark; completed ones carry a tick.
Until it is finalised, a run can always be sent back to step 3 and recalculated. After step 6 it cannot.
Before you start
Clear these three first, because all of them feed the calculation:
- No days without a clock-out remain in the Monthly Recap
- Every attendance correction for the period has been decided
- Every overtime and claim that should be included has been approved
Clearing them after the run is final means the corrections can only enter the following period.
Step 1 — Choose the period
Use the month picker in the top right.
Future periods are refused — pay cannot be calculated for a month that has not happened.
Step 2 — See who is included
If any employees are skipped, a box appears with their names and the reason — "no salary components yet", for instance — along with a pointer to the page that fixes it.
Employees never disappear silently
This is deliberate. If someone is missing from the payroll list, this page tells you why rather than simply omitting them.
Always read this box before continuing. An employee missed and only discovered after payday is a far more expensive problem.
Step 3 — Calculate the draft
Click Calculate draft. The system computes pay for every eligible employee.
The draft may be recalculated as often as needed — employees cannot see it yet. If it has been calculated before, the button becomes Recalculate and asks for confirmation, because the previous result will be overwritten.
Step 4 — Review
This is the most important part. Three things to check:
The summary cards
Employee count, total gross, total deductions, total paid, and company cost.
Company cost is gross plus the employer's contributions — that is the figure actually leaving the bank, not the total employees receive.
The "vs last month" column
This is the most effective error catcher in the whole Payroll menu
If someone's pay changes by more than a set percentage against last month, the column is flagged.
Pay that suddenly differs sharply is almost always a data-entry error — an extra zero, a component nobody removed, or proration that should not have applied. Check every flagged row before continuing.
Per-payslip detail
Click any row to open its detail: every earning and deduction line, with an explanation of where the figure came from.
There are no mystery numbers — every deduction states its basis.
The warning box
If there are problems, they appear above the table. Red must be fixed; amber should be checked but does not block.
Step 5 — Submit and approve
If the figures are right, click Submit for review.
Now someone else with approval rights opens the same page, checks it, and approves.
| Situation | What happens |
|---|---|
| You try to approve your own calculation | Refused |
| Red problems remain | The approve button is inactive |
| Something needs correcting | Use Return to draft |
Step 6 — Finalise
The approval holder presses Finalise & issue payslips.
A confirmation appears with the employee count and total to be paid, and asks for a mandatory note — "checked with Finance", for instance. That note becomes the audit trail.
After finalising:
- Payslips are issued and visible to employees
- Employees receive a notification
- The period is locked and cannot be recalculated
Finalising cannot be undone
Make sure step 4 has genuinely been checked. After finalising, corrections can only be recorded as adjustments in the following period.